Table of Contents
Brief History of Pasta
I love making pasta now that I know how. For the longest time, I would not even learn because I was so terrified and intimidated by making pasta. The thought of failing so hard got me to never try. If you are feeling the same, then it’s time to get over it and start your pasta journey like I did. In this post, I will show you how to make fettuccine pasta using semolina flour with a KitchenAid mixer. Once you learn how to make the base dough, then you can begin to experiment with shaping it in other ways.
Trust me, you will enjoy fresh pasta and all the benefits. But first, how did pasta come to be a food item?
The story of pasta stretches back to ancient times, weaving through various cultures and epochs. Though often associated with Italy, pasta's origins can be traced to ancient civilizations across the globe, from the noodles of China to the couscous of North Africa. The form of pasta we recognize today began to take shape in Italy during the Middle Ages, where it was prized for its simplicity, long shelf life, and versatility. By the Renaissance, pasta had become a staple of Italian cuisine, with different regions developing their own signature shapes and recipes. It was during these times that the art of pasta making flourished, with techniques and traditions that have been passed down through generations to the present day.

Pasta Being Made In An Ancient Location
Benefits of Making Pasta from Scratch
Making pasta from scratch is a tradition that offers numerous benefits, providing a culinary experience that goes beyond the mere act of cooking. Here are some of the key advantages:
Freshness: Homemade pasta comes with an incomparable freshness that can elevate the taste and texture of your dish. Unlike dried pasta, fresh pasta has a tender, more delicate consistency that absorbs sauces beautifully.
Taste: The flavor of homemade pasta is richer and more nuanced than store-bought varieties. By making your own, you control the quality of ingredients, ensuring that every bite is filled with the true essence of the ingredients used.
Customization: One of the greatest joys of making pasta from scratch is the ability to customize every aspect of it. From the type of flour to the addition of flavors and colors (like spinach for green pasta or beetroot for red pasta), homemade pasta allows for creativity and personalization. You can experiment with shapes and sizes, tailoring the pasta to suit the sauce or dish you plan to pair it with.
Nutritional Value: By choosing your ingredients, you can make healthier pasta. Whole wheat, legume-based flours, or adding vegetable purees can boost the nutritional content of your pasta, offering a wholesome alternative to processed options.
Therapeutic Process: The process of making pasta can be incredibly therapeutic. The act of kneading dough, rolling it out, and shaping it requires a level of mindfulness and physical engagement that can be a meditative and stress-relieving activity.
Embarking on your pasta-making journey requires understanding the core ingredients and tools that will turn simple components into culinary masterpieces. As a fledgling chef, focusing on these essentials will not only equip you with the basics but also inspire confidence as you delve into the art of pasta making.

Person Making Pasta From Scratch In The Kitchen
Recommended Tools
Pasta Machine: A pasta machine is invaluable for rolling the dough to a uniform thickness and cutting it into even strands. While manual pasta rollers are great for beginners, electric versions can speed up the process. I use a KitchenAid mixer.
Rolling Pin: Essential for initially rolling out the dough before it's thin enough to go through the pasta machine. It's also indispensable for making certain types of hand-shaped pasta.
Mixing Bowls: Large, sturdy mixing bowls are needed for mixing the dough ingredients before kneading.
Knife or Pasta Cutter: For cutting pasta if you're not using a machine or for creating specific shapes. A fluted pasta cutter can also add decorative edges to your pasta.
As a beginner, the quality of your ingredients plays a significant role in the outcome of your pasta. Choosing high-quality, fresh ingredients will not only make your pasta taste better but also enhance your overall cooking experience. Remember, the simplicity of pasta makes each ingredient shine, so select the best you can afford or find.
This focus on ingredients, coupled with the right tools, sets the foundation for successful pasta making. It's an invitation to explore the depths of Italian culinary tradition from your kitchen, turning simple elements into dishes that delight and satisfy.
Creating the perfect pasta dough is the cornerstone of successful pasta making. This chapter will guide you through the process of making pasta dough from scratch, offering tips to ensure your dough has the ideal texture and elasticity for rolling and shaping. As a fledgling chef, mastering the dough is your first step toward culinary success with homemade pasta.

Kitchenaid Mixer Pasta Cutter Rolling Pins
Ingredients for Pasta Dough
Flour: The foundation of pasta dough. While all-purpose flour can be used, many seasoned pasta makers prefer "00" flour, known for its fine texture and high gluten content, which makes for silky-smooth dough. For a heartier texture and more rustic flavor, semolina flour, made from durum wheat, is another excellent choice.
Eggs: Eggs add richness, color, and structure to pasta dough. The yolks contribute to the dough's elasticity and tenderness, making it easier to work with and giving the cooked pasta a luxurious mouthfeel.
Salt: A critical ingredient that enhances the flavor of the pasta. Salt is typically added to the dough in moderation and also used generously in the pasta cooking water to season the pasta itself.
Olive Oil: Though not used in all pasta recipes, olive oil can be added to the dough to enrich flavor, improve texture, and make the dough more pliable and easier to work with.
Focusing on the quality of these ingredients can significantly affect the taste and texture of your pasta. Fresh, high-quality eggs and the right type of flour can transform your pasta from good to extraordinary.

Semolina Flour Salt Olive Oil Eggs On A Table
Step-by-Step Guide to Making Pasta Dough
Measuring Ingredients: Start by measuring your ingredients accurately. A general rule of thumb for serving size is about 100g of flour per egg per person. Semolina is my go to flour for when making pasta. I buy it in 50 pound bags for less than $10 and store it in food safe 5-gallon buckets in the basement.
Mixing Ingredients:
Place 3/4 of the flour in the mixing bowl for your mixer. Some people like to start with the flour on a clean, flat surface, making a well in the center, then adding eggs. I'm using the mixer. Crack the eggs into the mixing bowl and add the salt, water and a smidge of olive oil. Turn the mixer on low and make sure you have the paddle mixer loaded. Now gently mix the ingredients, gradually incorporating the 1/4 of additional flour until one mass of dough forms.
Kneading the Dough:
Once the mixture becomes too thick to stir with the KitchenAid, pull it out and begin kneading with your hands. Knead the dough for about 10 minutes, until it becomes smooth and elastic. If the dough is too sticky, add a little more flour; if too dry, add a few drops of water.
Resting the Dough:
Wrap the dough in plastic wrap or cover it with an inverted bowl and let it rest for at least 30 minutes at room temperature. This resting period allows the gluten in the dough to relax, making it easier to roll out.
Tips for Perfect Pasta Dough
Texture is Key: The dough should be firm and slightly tacky but not sticky. It should spring back slowly when poked.
Adjusting Consistency: Don't be afraid to adjust the dough's consistency by adding a little more flour or water as needed. The exact amount can vary depending on the size of the eggs and the humidity.
Patience with Kneading: Kneading is crucial for developing gluten, which gives pasta its structure and texture. Be patient during this step to ensure the best results.
Rest Makes Best: Allowing the dough to rest is vital. This step makes the dough less resistant to rolling and shaping.
By following these steps and tips, you'll be able to create a versatile pasta dough that's ready to be transformed into delicious, homemade pasta. This foundation recipe opens up a world of culinary possibilities, from simple spaghetti to intricate stuffed pastas. As you gain confidence and skill, you'll find that making pasta dough becomes an intuitive and rewarding part of your cooking repertoire.
Transforming your homemade pasta dough into fettuccine is especially convenient and efficient when using KitchenAid mixer attachments. This method leverages the power and versatility of your KitchenAid mixer, equipped with pasta roller and cutter attachments, to streamline the pasta-making process. Here's how to shape your pasta dough into perfect fettuccine using these helpful tools.
Tools Needed
KitchenAid stand mixer
Pasta roller attachment
Fettuccine cutter attachment
Preparing the Dough
Divide the Dough: Begin by dividing your rested dough into four equal portions. Working with smaller pieces of dough is more manageable and ensures even thickness.
Flattening for the Roller: Flatten the first portion of dough with your hands or a rolling pin until it's thin enough to pass through the pasta roller attachment at its widest setting.
Rolling Out the Dough
Attach the Pasta Roller: Attach the pasta roller to your KitchenAid mixer according to the manufacturer's instructions. Set it to the widest setting.
First Pass: Turn the mixer to a low speed setting, and feed the dough through the pasta roller. Lightly dust the dough with flour if it becomes sticky.
Folding for Texture: Fold the dough in half and roll it through the widest setting again. Repeat this process 2-3 times. This helps to develop a smooth, elastic texture.
Thinning the Dough: Gradually adjust the roller to narrower settings, passing the dough through each setting once until it reaches the desired thickness. For fettuccine, a medium setting (typically 4 or 5 on a KitchenAid roller) is ideal.
Cutting the Dough into Fettuccine
Attach the Fettuccine Cutter: Once your sheets of pasta are rolled out, replace the roller attachment with the fettuccine cutter attachment on your KitchenAid mixer. There is a dial on the roller with 8 settings. I like to go about three settings from the thinnest for my fettuccine.
Cutting the Pasta: Turn the mixer to a low speed setting, and feed the sheets of pasta through the fettuccine cutter. Hold the cut pasta with your free hand as it comes through the cutter to prevent tangling.
Drying: Lay the cut fettuccine on a drying rack or a clean kitchen towel, allowing them to dry for about 15 minutes before cooking. This helps to prevent sticking and ensures they cook evenly. You can also sprinkle additional semolina over the pasta to help prevent sticking.
Benefits of Using KitchenAid Attachments
Using KitchenAid attachments not only simplifies the pasta-making process but also ensures consistently shaped pasta. The precision of the pasta roller and cutter attachments allows for a uniform thickness and width, enhancing the overall quality and presentation of your dishes.
Making pasta with KitchenAid attachments also opens the door to experimenting with various pasta shapes and textures, as KitchenAid offers a range of attachments suited for different pasta types. As you grow more comfortable with the process, you'll find that making homemade pasta is a delightful and satisfying culinary adventure, offering endless possibilities for creativity and customization.
The goal is to achieve the ideal 'al dente' texture, where the pasta is tender but still firm to the bite. This chapter covers the essential techniques for boiling pasta, suggests sauce pairings to complement different pasta shapes, and provides tips for storing fresh pasta.

A Cook Is Mixing Eggs Flour Sugar And Olive Oil
Boiling Pasta: Timing and Tips
Use a Large Pot: Fill a large pot with plenty of water, allowing the pasta room to move freely. This prevents sticking and ensures even cooking.
Salt the Water: Once the water is boiling, add a generous amount of salt. This is your only chance to season the pasta itself, and it should taste as salty as seawater.
Add the Pasta: Gently add your pasta to the boiling water. If cooking long strands, wait until the water returns to a boil and use chopsticks or a fork to gently stir, ensuring the strands don’t stick together.
Stir Occasionally: Stir the pasta occasionally to prevent it from sticking to the bottom of the pot or clumping together.
Check for Doneness: Start tasting the pasta a couple of minutes before you think it should be done. Fresh pasta cooks much quicker than dried—usually in 2-4 minutes. Look for an 'al dente' texture, where the pasta is cooked through but still firm to the bite.
Reserve Pasta Water: Before draining the pasta, reserve a cup of pasta water. This starchy water is great for adjusting the consistency of your sauce.
Drain and Serve: Drain the pasta in a colander, but do not rinse it. Rinsing cools the pasta and removes the starch that helps sauce cling to it. Add it to your sauce immediately for the best texture and flavor integration.
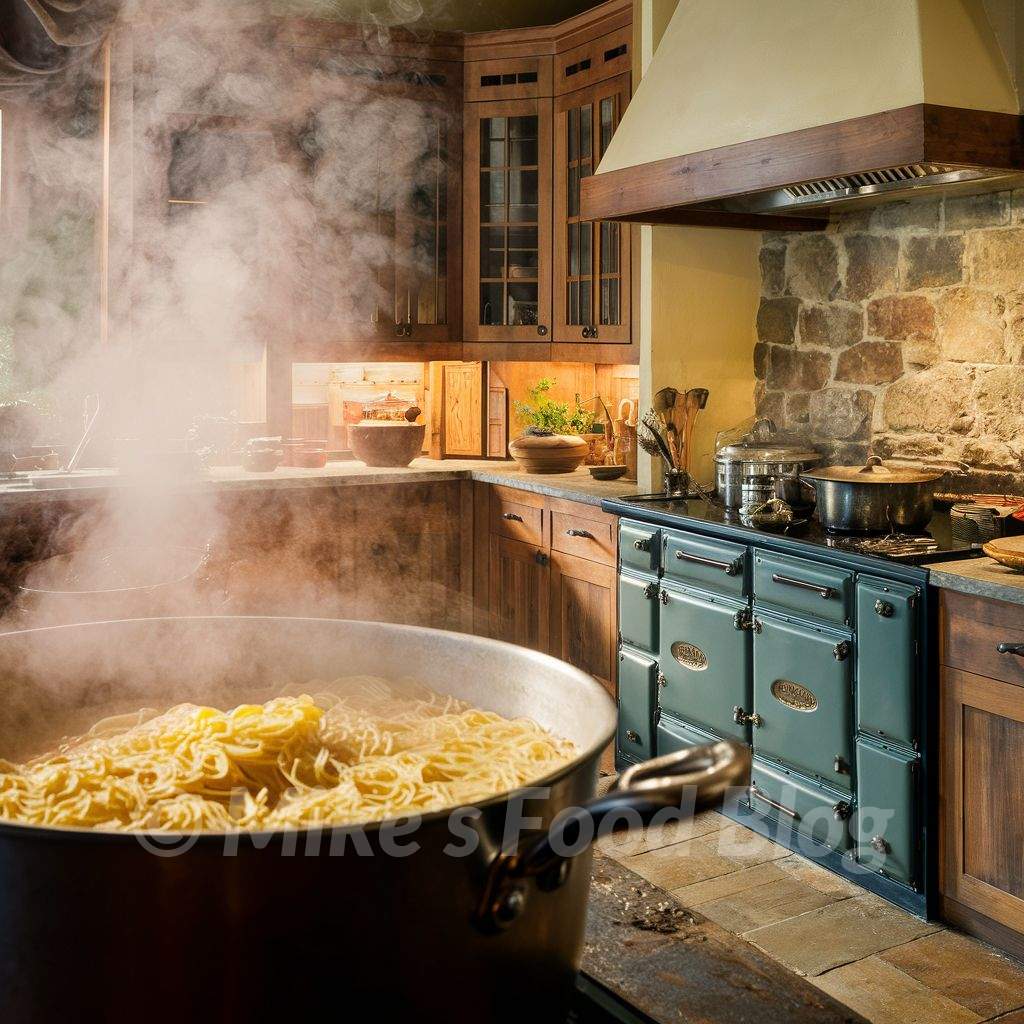
Boiling Pasta In The Kitchen
Pairing Pasta with the Right Sauce
The fettuccine pasta I made was paired with an alfredo sauce. It’s one of my family favorites. I can still remember Chef Adrian at the Dinner Horn, a restaurant I worked at when I was 16, making fresh pasta with a cream sauce for all the employees. Chef Adrian would load up the dish with this creamy pasta and shred parmesan over the top, then into the salamander to make the cheese into a crust.
The shape and texture of your pasta can influence which sauce pairs best with it:
Long, Thin Pasta (e.g., Spaghetti, Fettuccine): Best with lighter, smoother sauces that coat the strands evenly, such as tomato basil or creamy Alfredo.
Ribbon Pasta (e.g. Tagliatelle, Pappardelle): Ideal for thicker, meatier sauces that cling to the wide, flat surfaces.
Tubular Pasta (e.g., Penne, Rigatoni): Great with chunky vegetable or meat sauces that can get inside the tubes for extra flavor with each bite.
Stuffed Pasta (e.g., Ravioli, Tortellini): Usually served with a simple butter or oil-based sauce to let the filling shine.

Seven Different Pasta Sauces On One Plate
Storage Advice for Fresh Pasta
Refrigeration: Fresh pasta can be stored in the refrigerator for up to 2 days. Lightly flour the pasta and place it in an airtight container or a plastic bag to prevent it from drying out.
Freezing: For longer storage, fresh pasta can be frozen. Lay the pasta flat on a baking sheet to freeze individually, then transfer it to a freezer bag or container. Frozen pasta can be cooked directly from the freezer, just add a minute or two to the cooking time.
Drying: Some fresh pasta, especially those with a lower moisture content, can be dried at room temperature. Once fully dry, it can be stored in a cool, dry place for several weeks.
Cooking homemade pasta to perfection and pairing it with a complementary sauce can transform a simple meal into a gourmet experience. With these tips and techniques, you’re well on your way to enjoying delicious, homemade pasta dishes that are sure to impress.
As someone who once viewed pasta-making with apprehension, I've discovered the profound joy and simplicity in crafting pasta from scratch. My journey from doubt to delight in making fettuccine using semolina flour with a KitchenAid mixer has been transformative. This experience has not only enriched my culinary skills but also deepened my appreciation for the art of pasta making. I'm excited to share this journey with you, encouraging those who may feel hesitant to dive into the rewarding world of homemade pasta.
The history of pasta, coupled with the tangible benefits of creating your own—such as unparalleled freshness, the ability to customize flavors, and the nutritional advantages of selecting your ingredients—has made this venture incredibly fulfilling. From the therapeutic process of kneading dough to the satisfaction of enjoying a plate of pasta tailored to my taste, the entire process is a celebration of creativity and tradition. I invite you to start your pasta-making adventure, promising a delightful exploration of flavors and a newfound pride in your culinary creations.
Like Joy Of Making Homemade Pasta?
Share it with your friends. Comment and review below. Thanks for the love.
Comments
No comments yet. Be the first to share your thoughts!
Reviews
No reviews yet. Be the first to review!
Share Your Thoughts About Mike's Joy Of Making Homemade Pasta


Post a Comment
Do you have a comment about my Joy Of Making Homemade Pasta?